本文就api形式调用大模型以及本地文档向量化的步骤详细介绍
api调用chatglm 为了配合显存,需要调整api.py模型加载部分为int4量化
1 2 3 model = AutoModel.from_pretrained("chatglm-6b" , trust_remote_code=True ).quantize(4 ).half().cuda()
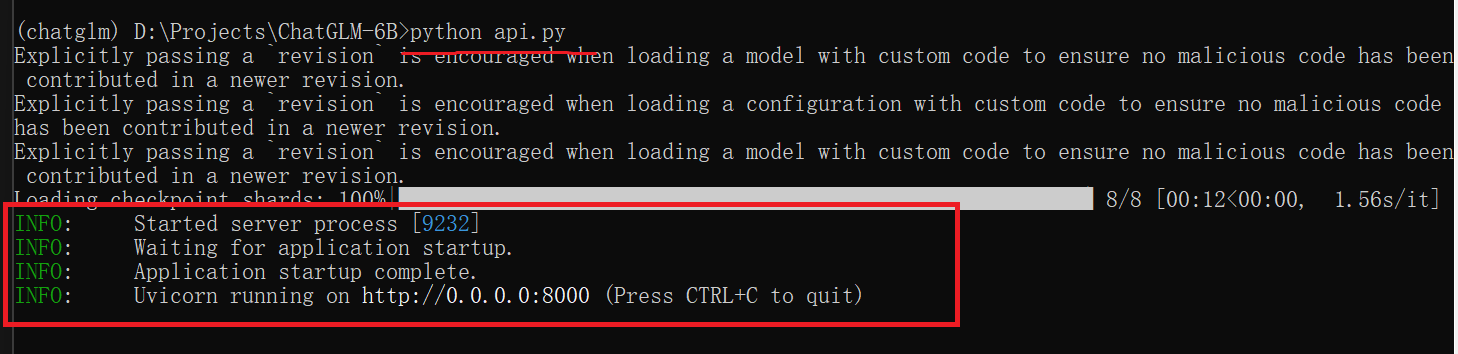
启服务 这样就代表启动成功
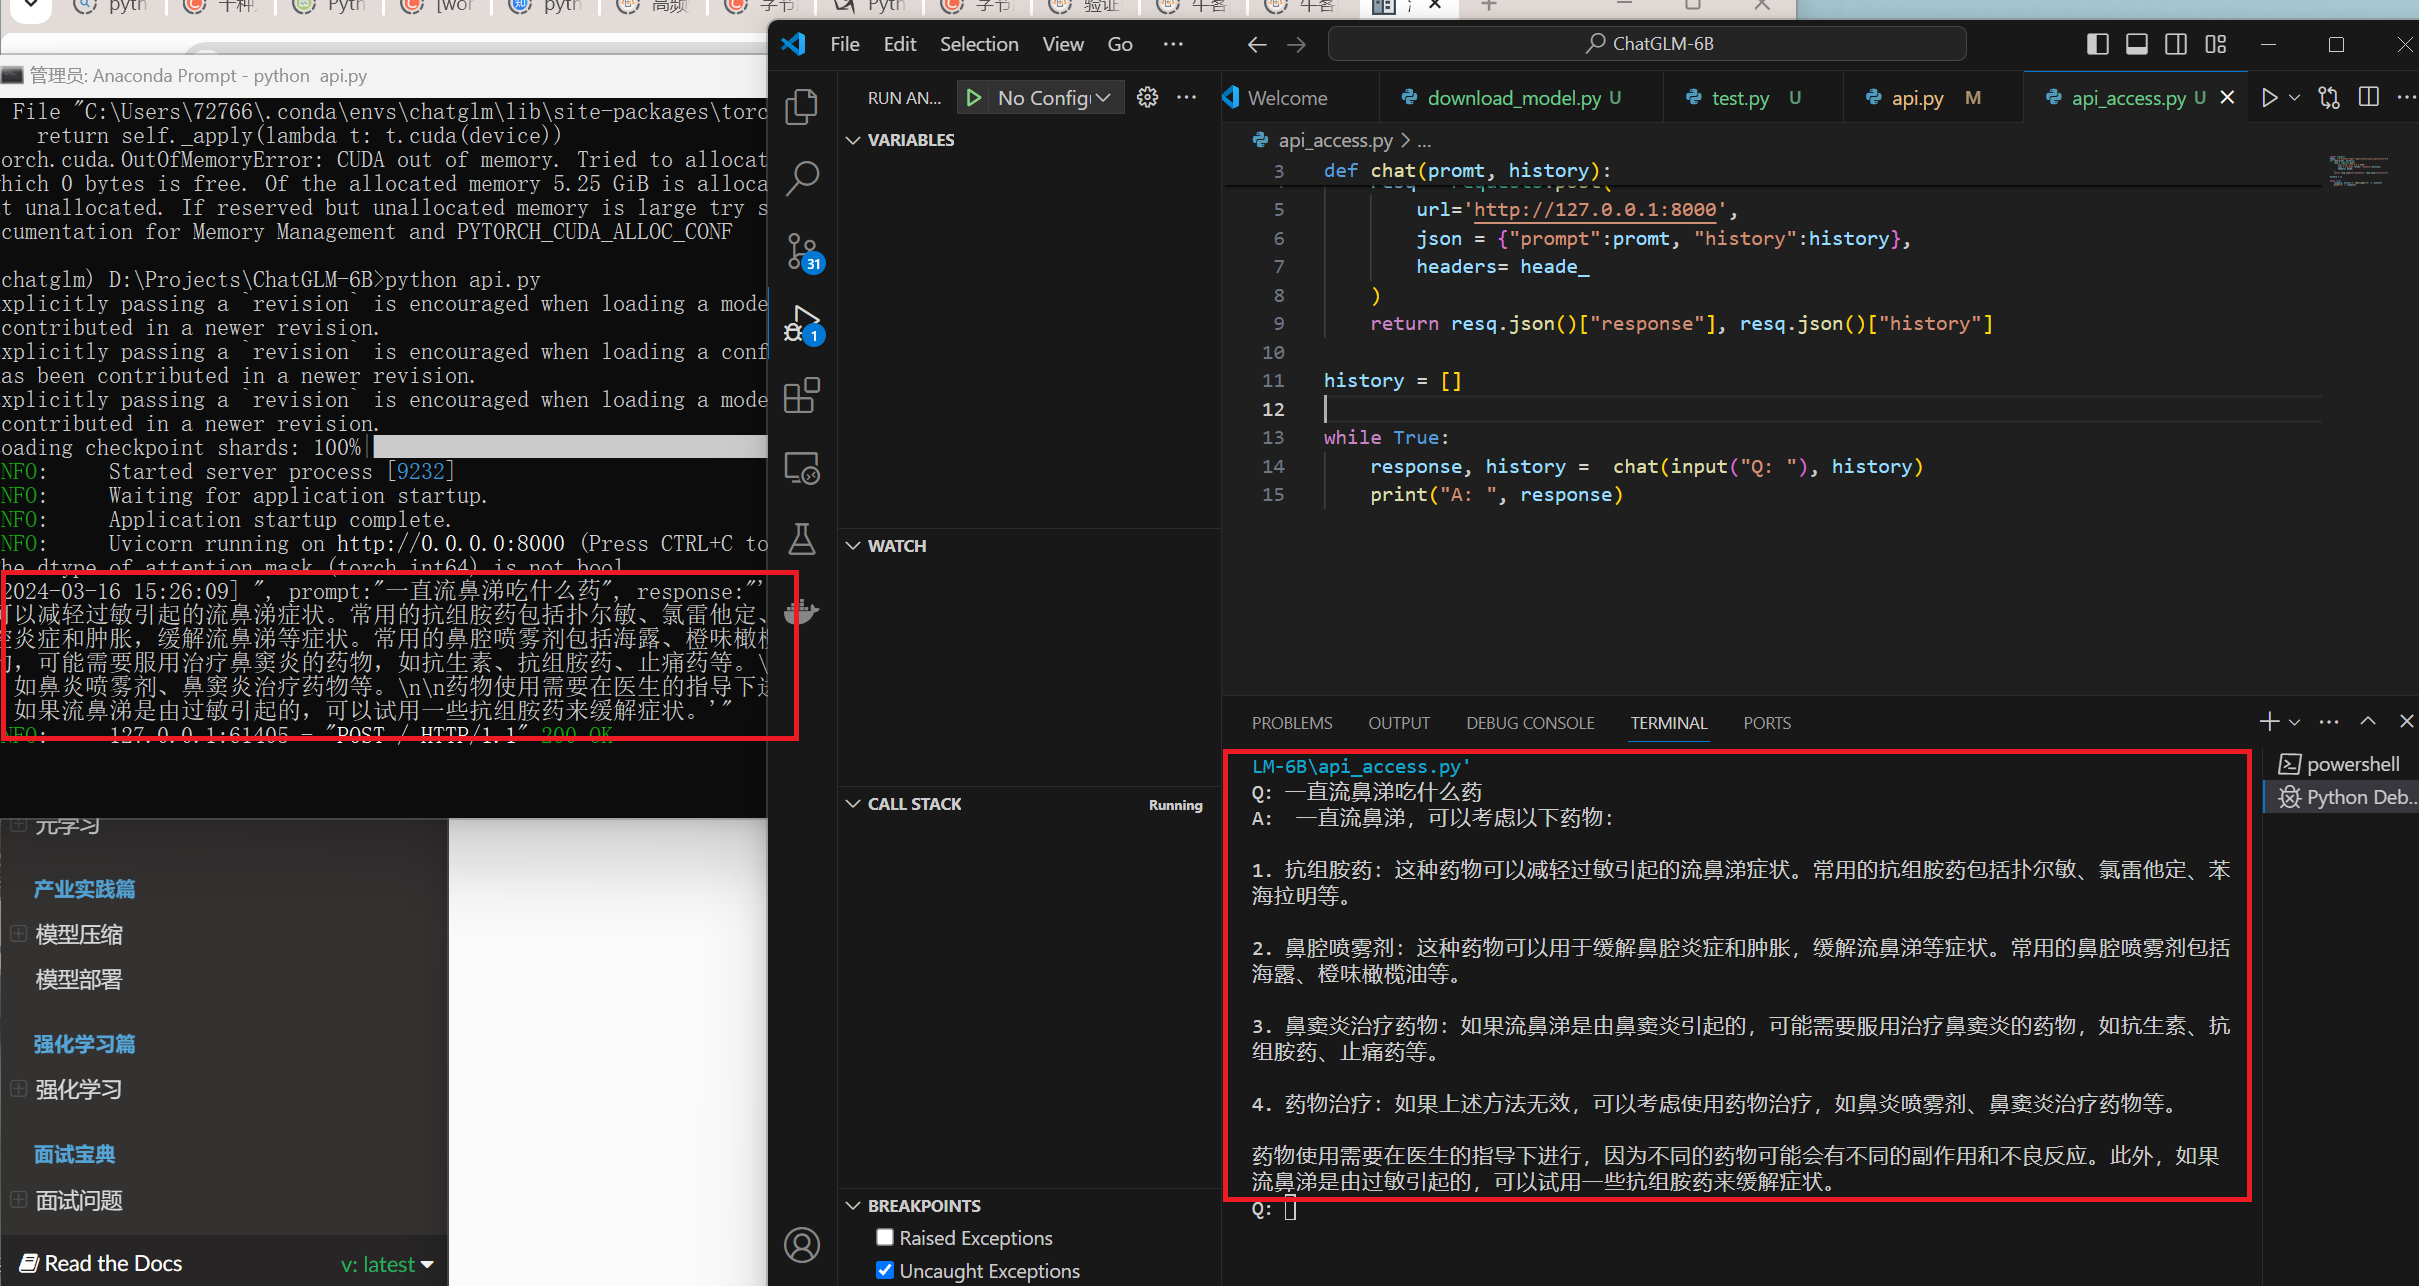
调用aip 1 2 3 4 5 6 7 8 9 10 11 12 13 14 15 import requestsheade_ = {"Content-Type" :"application/json;charset=utf-8" } def chat (promt, history ): resq = requests.post( url='http://127.0.0.1:8000' , json = {"prompt" :promt, "history" :history}, headers= heade_ ) return resq.json()["response" ], resq.json()["history" ] history = [] while True : response, history = chat(input ("Q: " ), history) print ("A: " , response)
也可以用curl的方式调用(windows下写法)
1 curl -X POST "http://127.0.0.1:8000" -H "Content-Type: application/json" -d "{\"prompt\": \"你好\", \"history\": []}"
postman调用方法
本地文档向量化 这里选择下载了甄嬛传和盗墓笔记的txt
文档格式统一 向量化txt用的是langchain.document_loaders.directory import DirectoryLoader函数,使用中发现非utf-8文档load失败,所以转换思路,按照文件写了一些非utf-8文档转换为utf-8的函数,在源文档基础上改写,新内容覆盖原始文档内容。
1 2 3 4 5 6 7 8 9 10 11 encode_out = 'utf-8' dirpath = 'own\\books' for book in os.listdir(dirpath): with open("{}/{}".format(dirpath, book), 'rb') as f: data = f.read() encoding_type = chardet.detect(data)["encoding"] # 获取输入文档的编码类型 if encoding_type != encode_out: with open("{}/{}".format(dirpath, book), mode='wb+') as fo: fo.write(data.decode(encoding_type,'ignore').encode(encode_out)) fo.close()
另外说一下我用下面这两种设置方式都没有成功,有没有懂得大佬指点一二。
1 2 3 4 5 6 7 8 9 from langchain.document_loaders.directory import DirectoryLoader DirectoryLoader( silent_errors=True ) from langchain.document_loaders.text import TextLoader TextLoader( autodetect_encoding=True )
几种有趣的文档加载方式 官网 提供了各式各样的加载文档的方式,其中也有很多有意思的接口,比如
可以提取视频字幕,有的原始视频没有字幕,这个方法也可以用
首先需要安装bilibili-api-python
1 pip install bilibili-api-python
其次使用方法
1 2 3 4 5 6 from langchain_community.document_loaders.bilibili import BiliBiliLoaderloader = BiliBiliLoader(['https://www.bilibili.com/video/BV1t8411y7fp/?p=4&spm_id_from=pageDriver&vd_source=9bfa62da16aae5e7da38cd1197e6acc7' ]) loader = loader.load() split_docs = RecursiveText.split_documents(loader) print (len (split_docs))
这里需要注意两个问题:
a.修正C:\Users\xxx\envs\chatglm\Lib\site-packages\langchain_community\document_loaders\bilibili.py
这里具体文件位置根据你自己的实际情况来有,总共有三处需要需改的地方
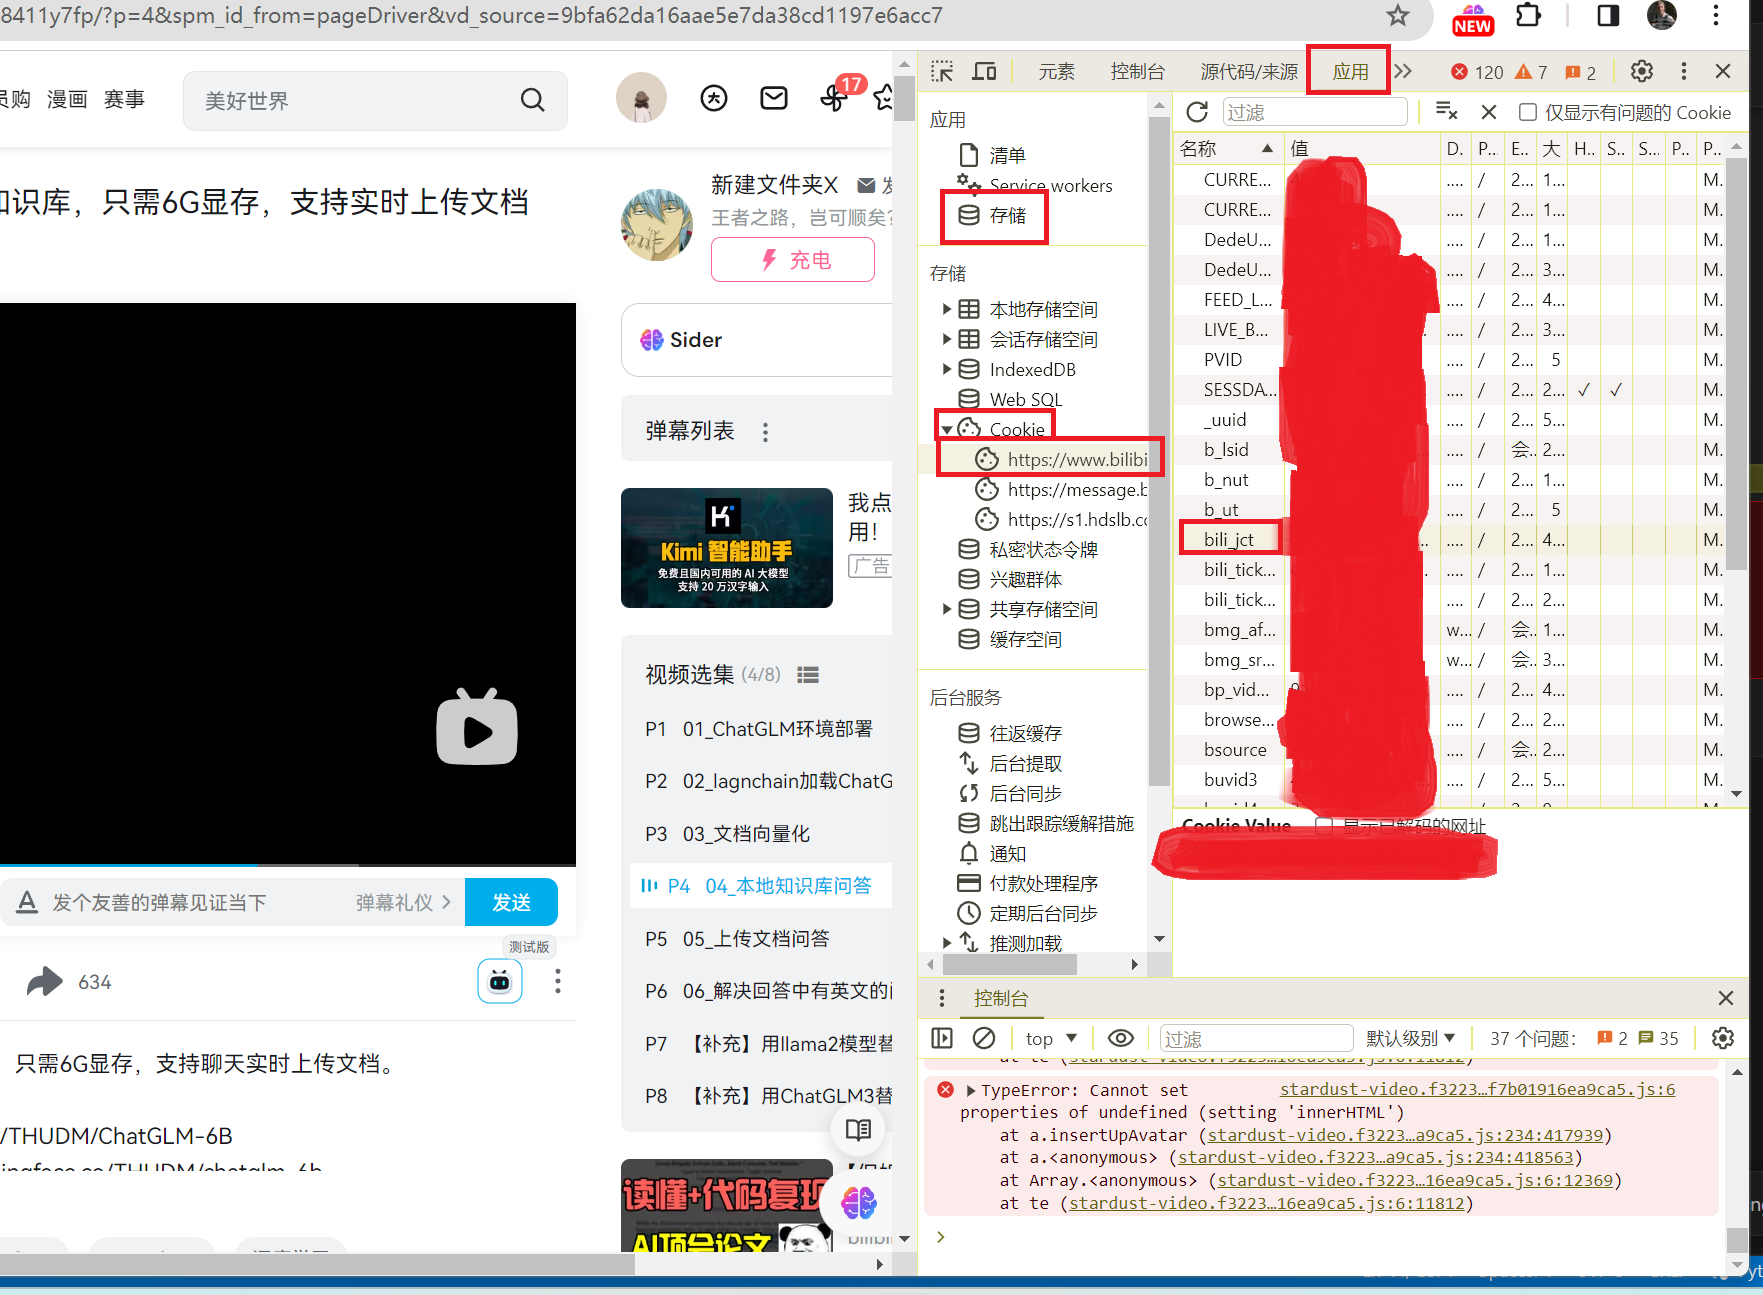
1 2 3 4 5 6 7 8 9 10 11 12 13 14 15 16 17 18 19 from bilibili_api import Credential sessdata = "your sessdata" bili_jct = "your bili_jct" buvid3 = "your buvid3" credential = Credential(sessdata=sessdata, bili_jct=bili_jct, buvid3=buvid3) if bvid is not None: v = video.Video(bvid=bvid.group(), credential=credential) else : aid = re.search(r"av[0-9]+" , url) if aid is not None: try: v = video.Video(aid=int(aid.group()[2:]), credential=credential) except AttributeError: raise ValueError(f"{url} is not bilibili url." ) else : raise ValueError(f"{url} is not bilibili url." )
这样可以避免之后调用api报错 Credential 类未提供 sessdata 或者为空。
sessdata、bili_jct以及buvid3的在goole chrome获取方式加下图
这里展示一下调用api的效果
可以看出,字幕基本是提取出来了。这个接口使用的时候一定注意要清除系统代理。
首先需要安装依赖
1 pip install unstructured_inference
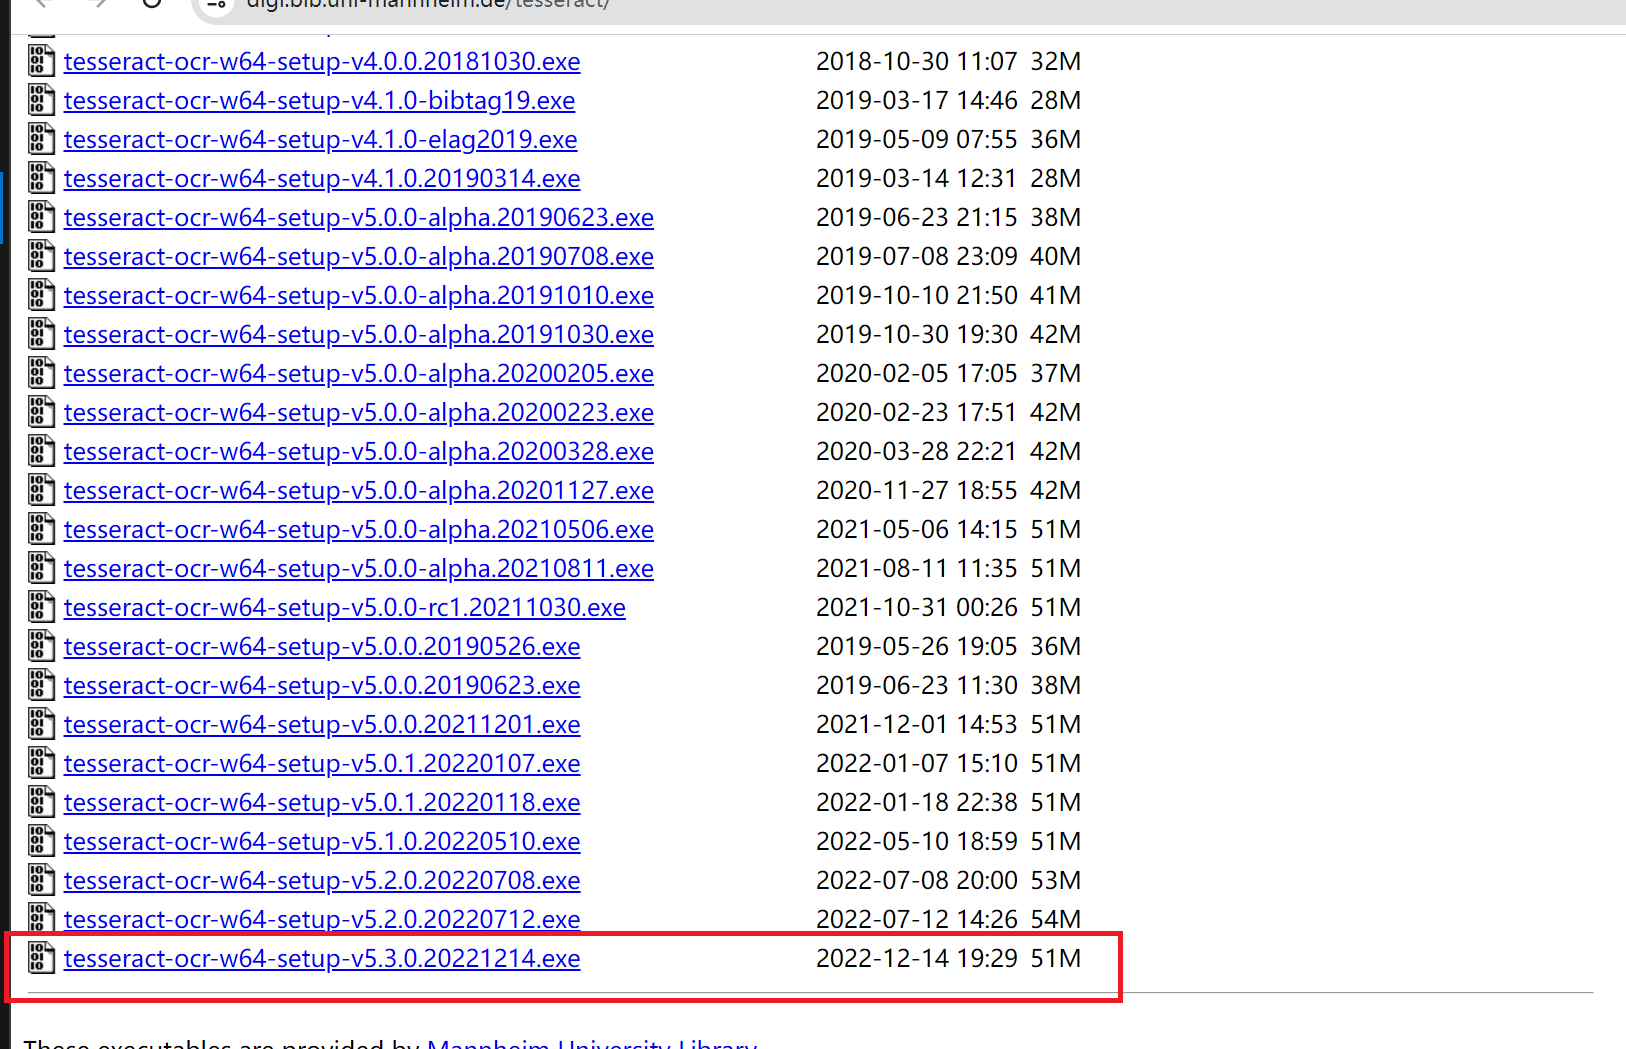
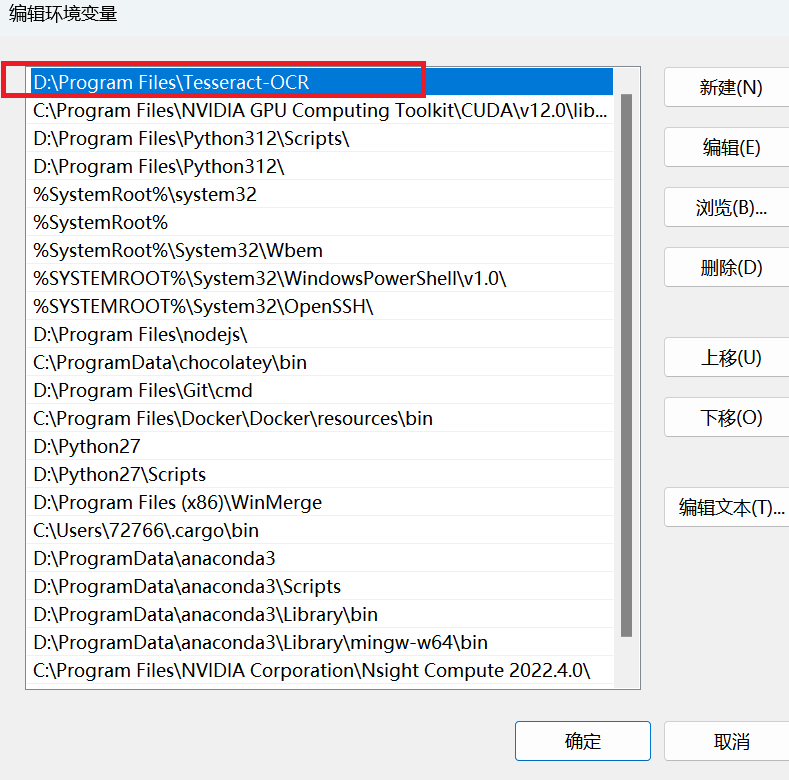
以及单独安装tesseract-ocr
并添加环境变量
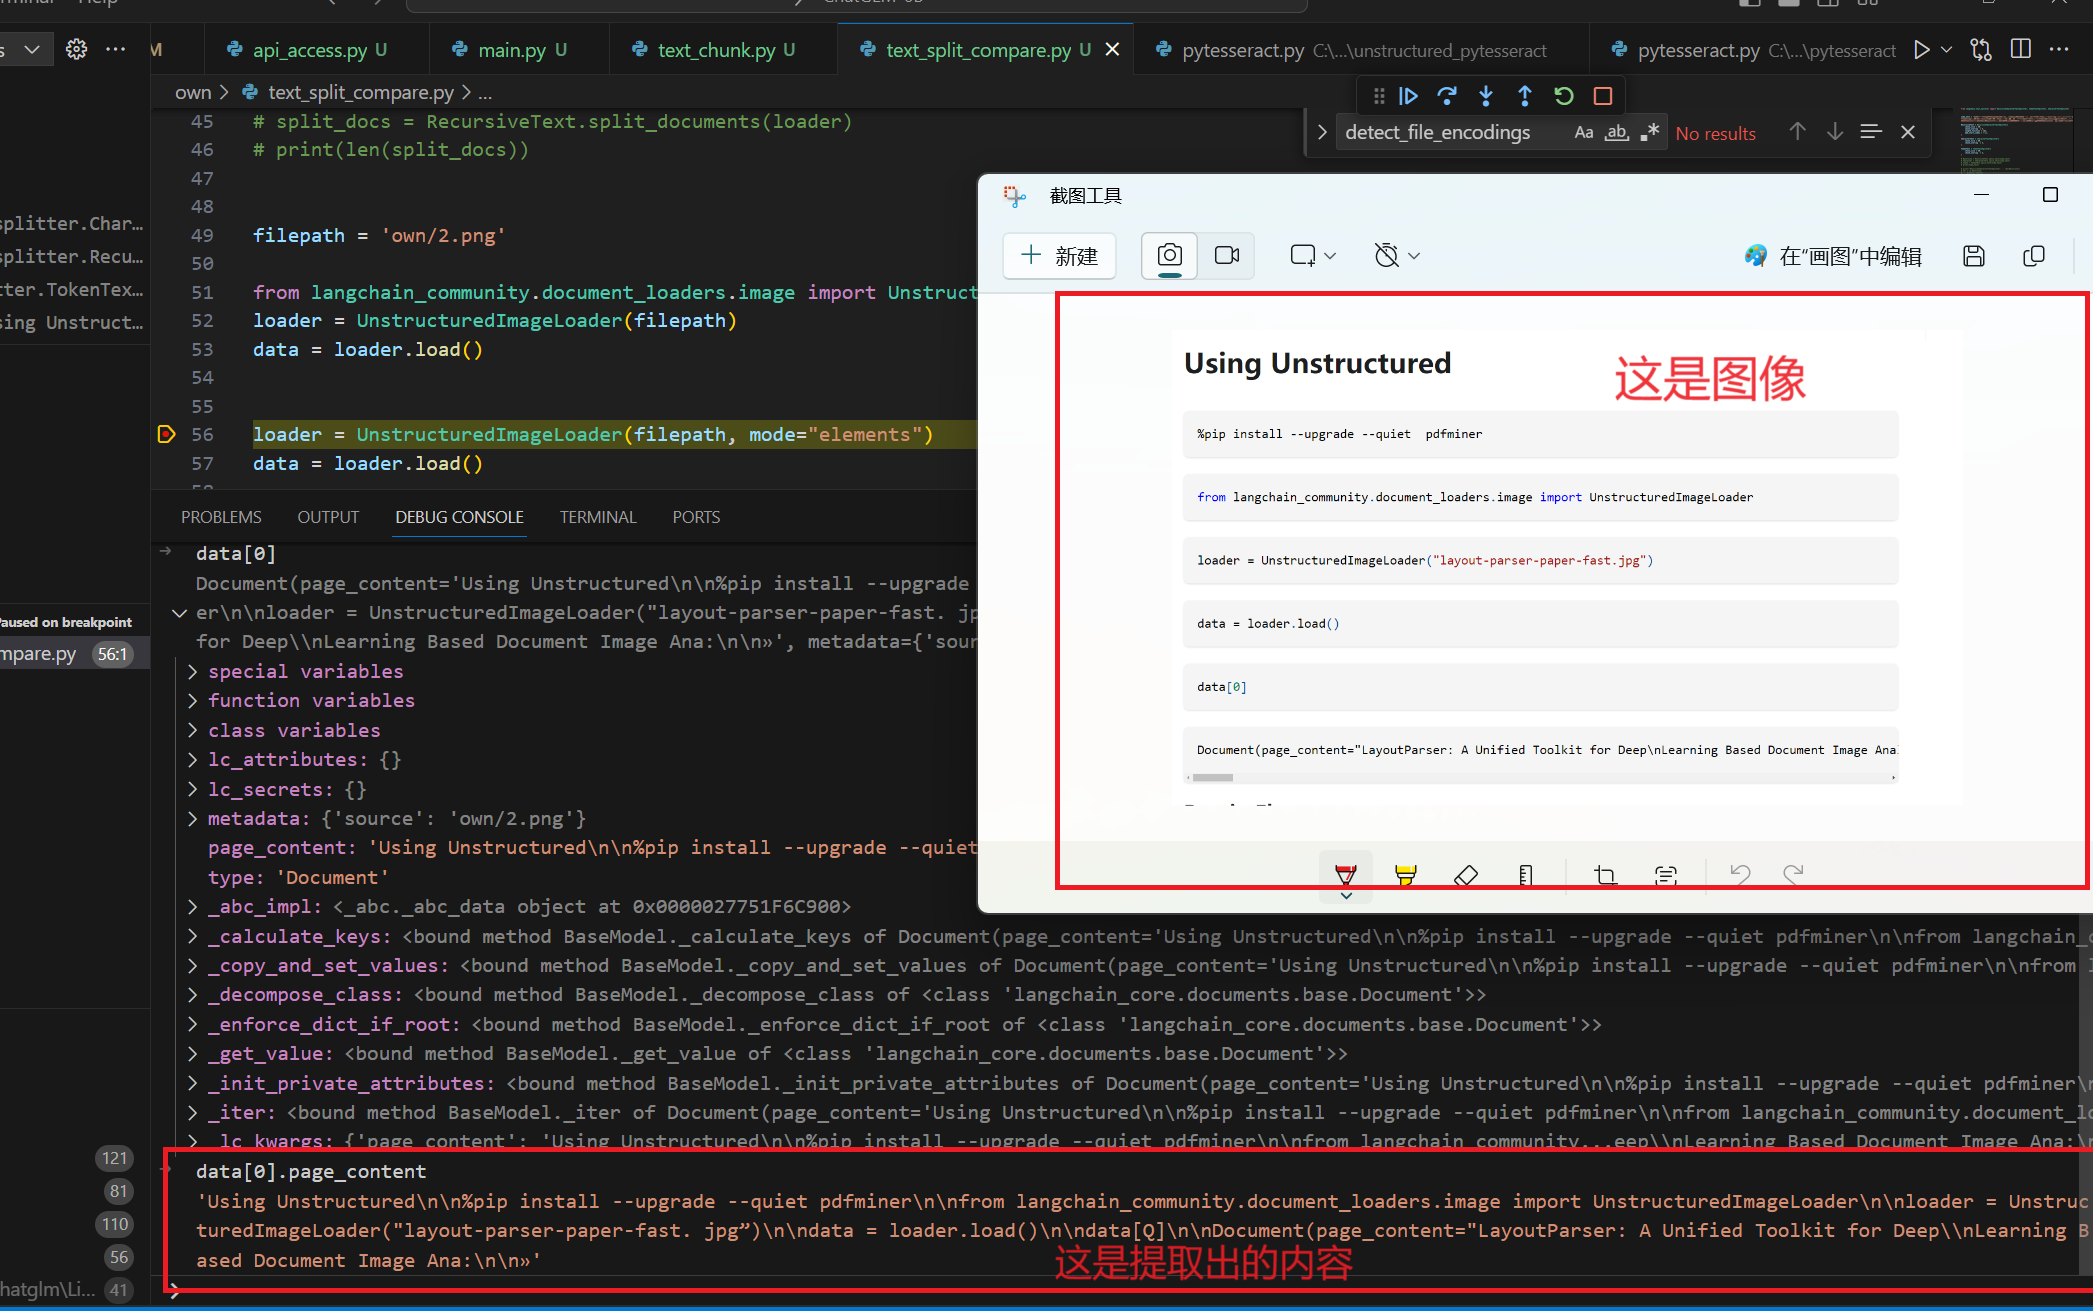
使用方法
1 2 3 4 filepath = 'own/2.png' from langchain_community.document_loaders.image import UnstructuredImageLoaderloader = UnstructuredImageLoader(filepath) data = loader.load()
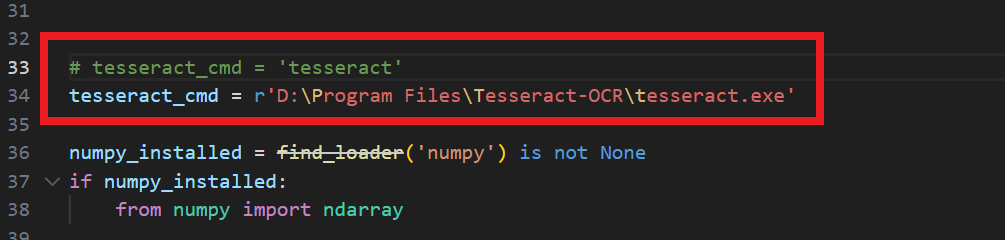
也是需要更改一个地方才能实现调用
C:\Users\xxx\envs\chatglm\Lib\site-packages\unstructured_pytesseract\pytesseract.py
这里因为调用的是unstructured_pytesseract,所以修改的unstructured_pytesseract下的pytesseract,还有一个pytesseract.py是C:\Users\xxx\envs\chatglm\Lib\site-packages\pytesseract\pytesseract.py,也可以如法炮制,以便之后使用正常。
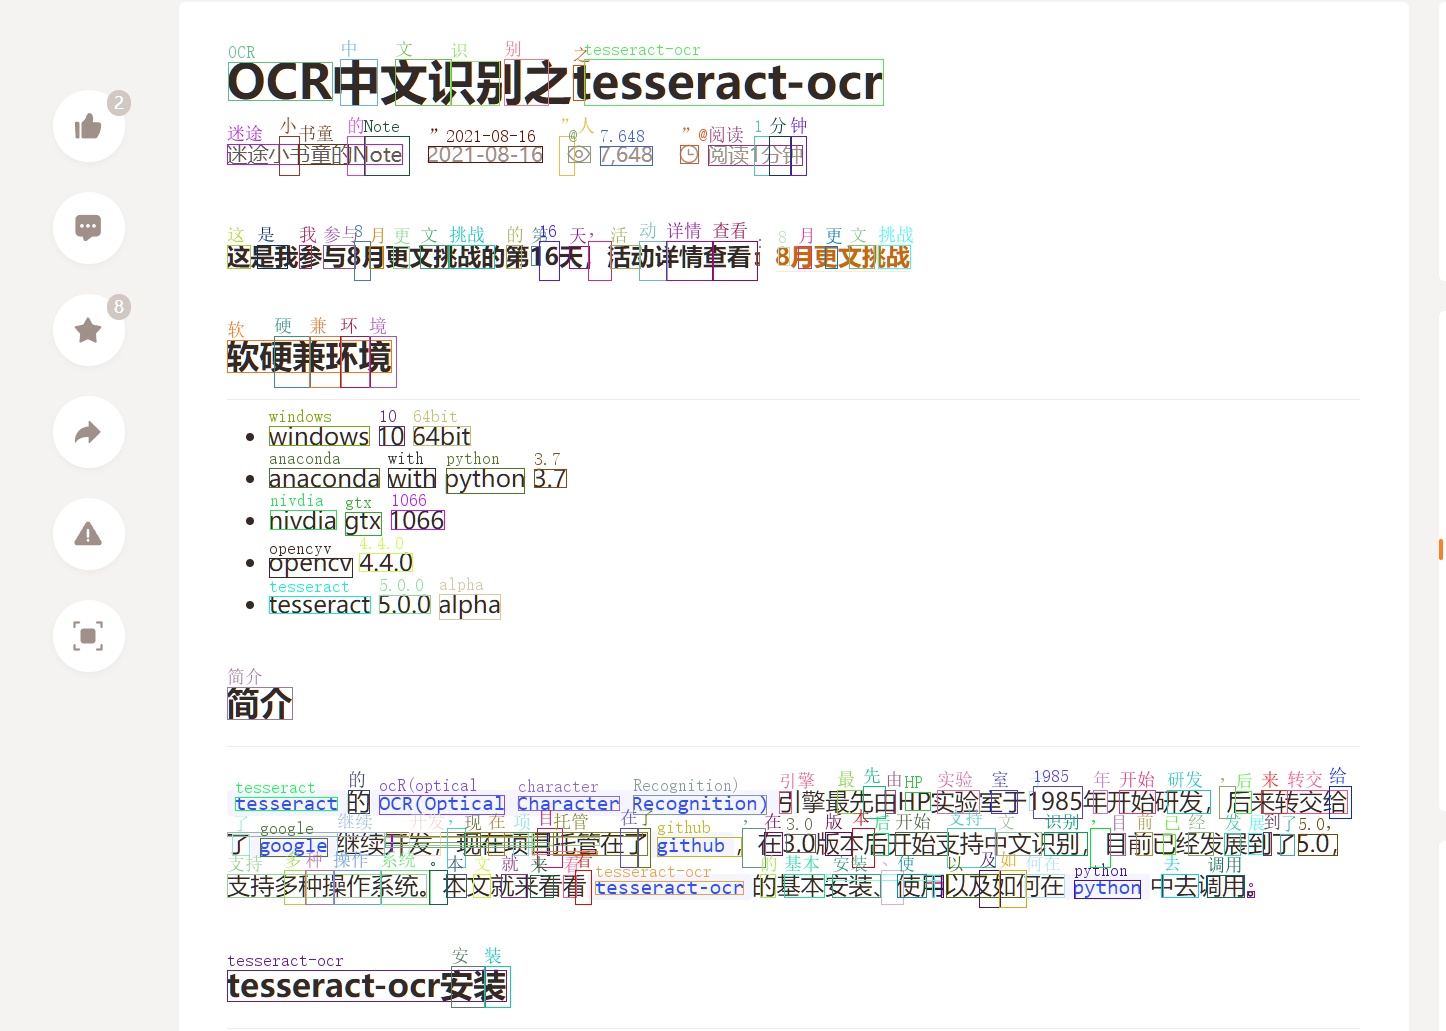
看一下加载图像后识别图像的文字效果如何
英文识别效果看起来可以,再看看中文如何识别
关于pytesseract使用的时候发现一些有意思的地方
一般画图的时候,默认左上角为坐标系起点,然而pytesseract的接口返回结果是以左下角为坐标系原点,所以不注意的时候会发现画的框的位置是错的。
1 2 3 4 5 6 7 8 9 10 11 12 13 14 15 16 17 18 19 20 21 22 23 24 25 26 27 28 29 30 from PIL import Image, ImageDraw,ImageFontimport numpy as npimport cv2import pytesseractfilepath = 'own/2.png' im = cv2.imread(filepath, cv2.IMREAD_COLOR) font = ImageFont.truetype(font="simsun.ttc" , size=18 , encoding="utf-8" ) img = Image.fromarray(im) draw = ImageDraw.Draw(img) text3 = pytesseract.image_to_boxes(im, output_type=Output.STRING, lang='chi_sim' ) print (text3)h, w = im.shape[:-1 ] outlist = text3.split('\n' ) for i in outlist: if len (i)==0 : continue (s, x0, y0, x1, y1, conf) = i.split(' ' ) x0, y0, x1, y1, conf = int (x0), h-int (y0), int (x1), h-int (y1), float (conf) draw.text((x0, y1 - 20 ), s, (255 , 0 , 0 ), font=font) draw.rectangle([(x0, y1), (x1, y0)], outline='red' ) outimage = cv2.cvtColor(np.array(img), cv2.COLOR_RGB2BGR) cv2.imshow("output" , outimage) cv2.imwrite('res.jpg' , outimage) cv2.waitKey(0 ) cv2.destroyAllWindows()
改成随机颜色
1 color = tuple (np.random.randint(0 , 255 , 3 , dtype=np.int32))
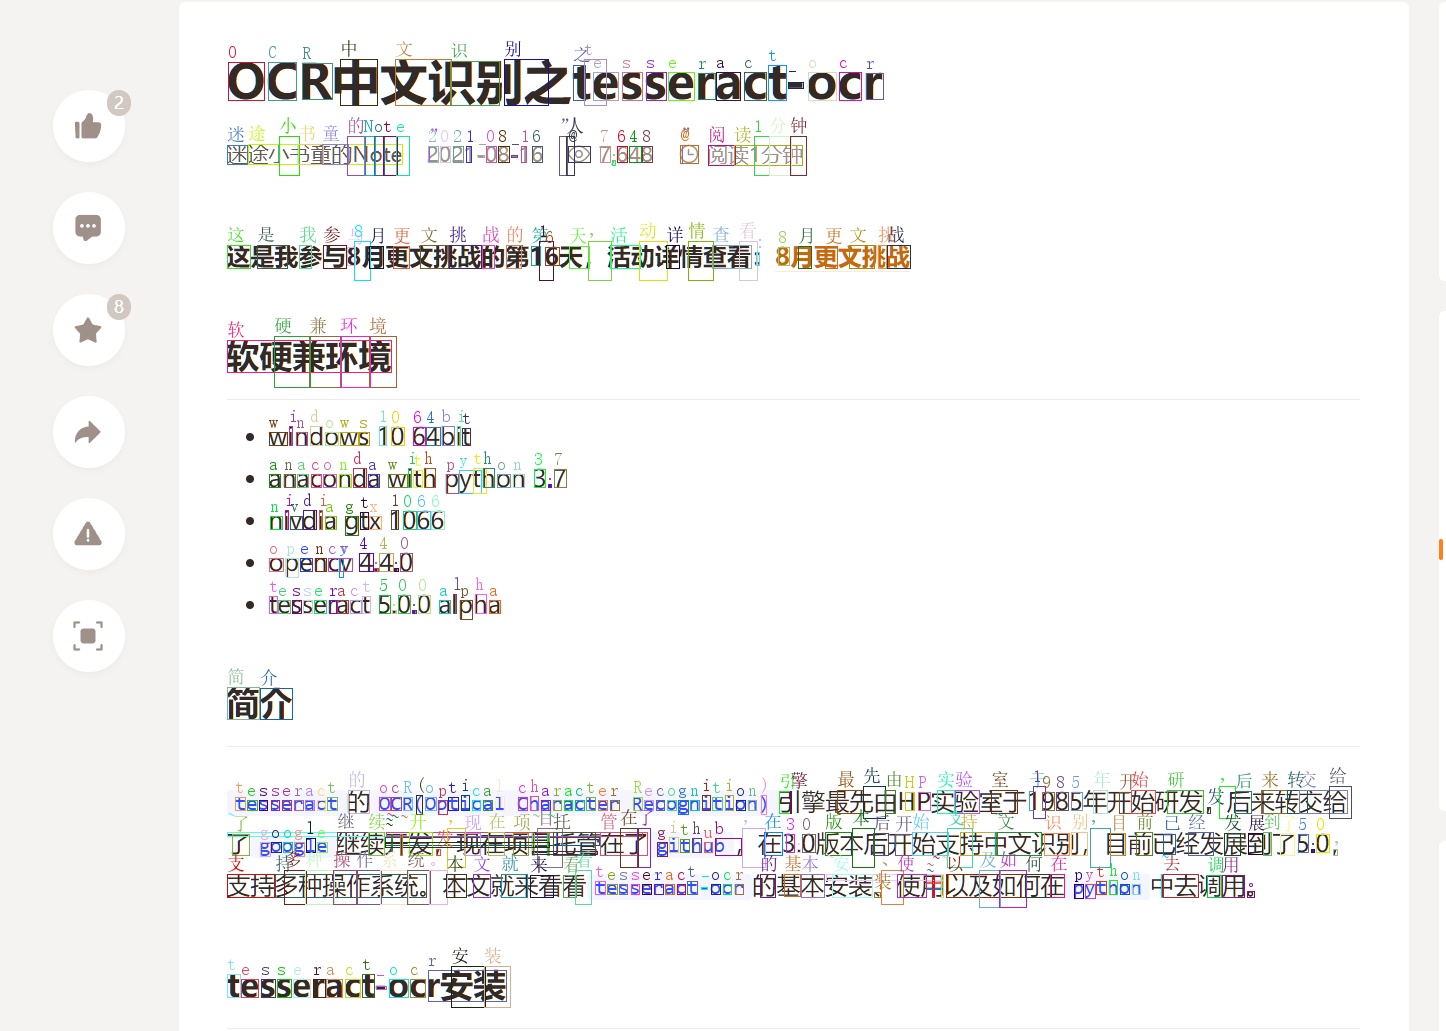
看看文字提取效果
文字大致上没有问题,提取的位置多多少少会有些偏差。
还有一种是按照词的结果返回,即一个框对应多个字词的样式。
1 2 3 4 5 6 7 8 9 10 11 12 def chunk_single (): tess_text = pytesseract.image_to_data(im, output_type=Output.DICT, lang='chi_sim' ) for i in range (len (tess_text['text' ])): word_len = len (tess_text['text' ][i]) if word_len > 0 : (x, y, w, h) = (tess_text['left' ][i], tess_text['top' ][i], tess_text['width' ][i], tess_text['height' ][i]) color = tuple (np.random.randint(0 , 255 , 3 , dtype=np.int32)) draw.text((x, y - 20 ), tess_text['text' ][i], color, font=font) draw.rectangle([(x, y), (x + w, y + h)], outline=color) outimage = cv2.cvtColor(np.array(img), cv2.COLOR_RGB2BGR) cv2.imwrite('res1.jpg' , outimage)
pytesseract.image_to_data的返回结果是不用做坐标转换的。
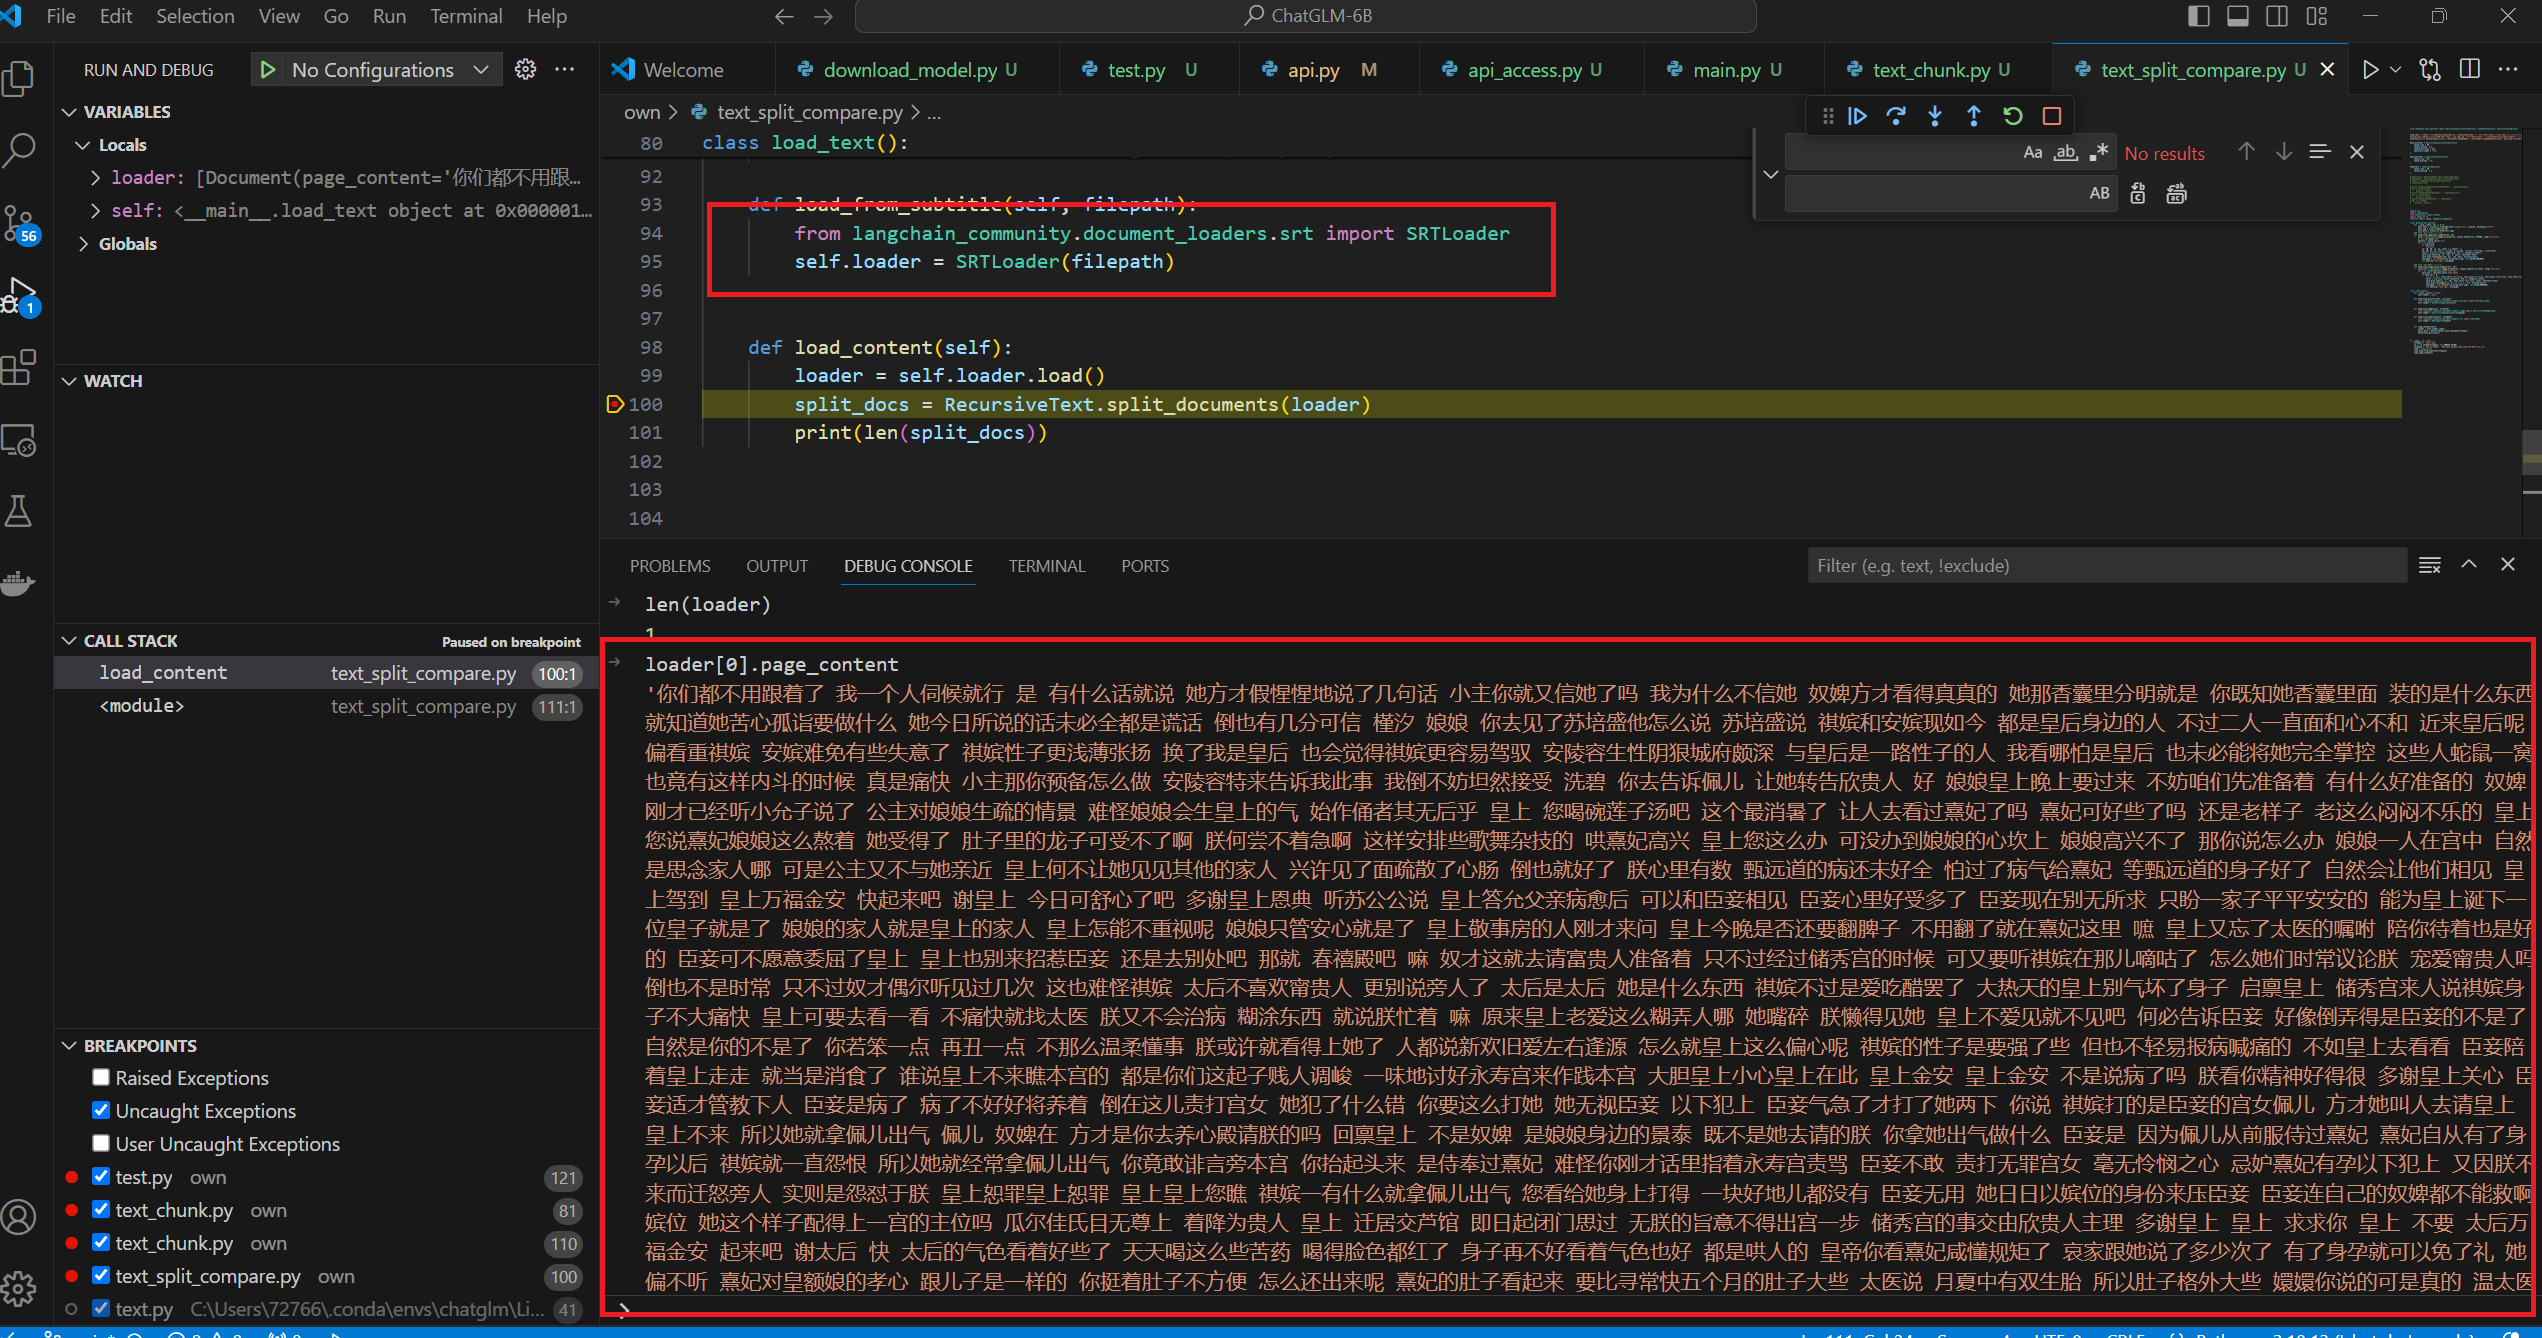
字幕文件内容提取,以电子榨菜甄嬛传为例
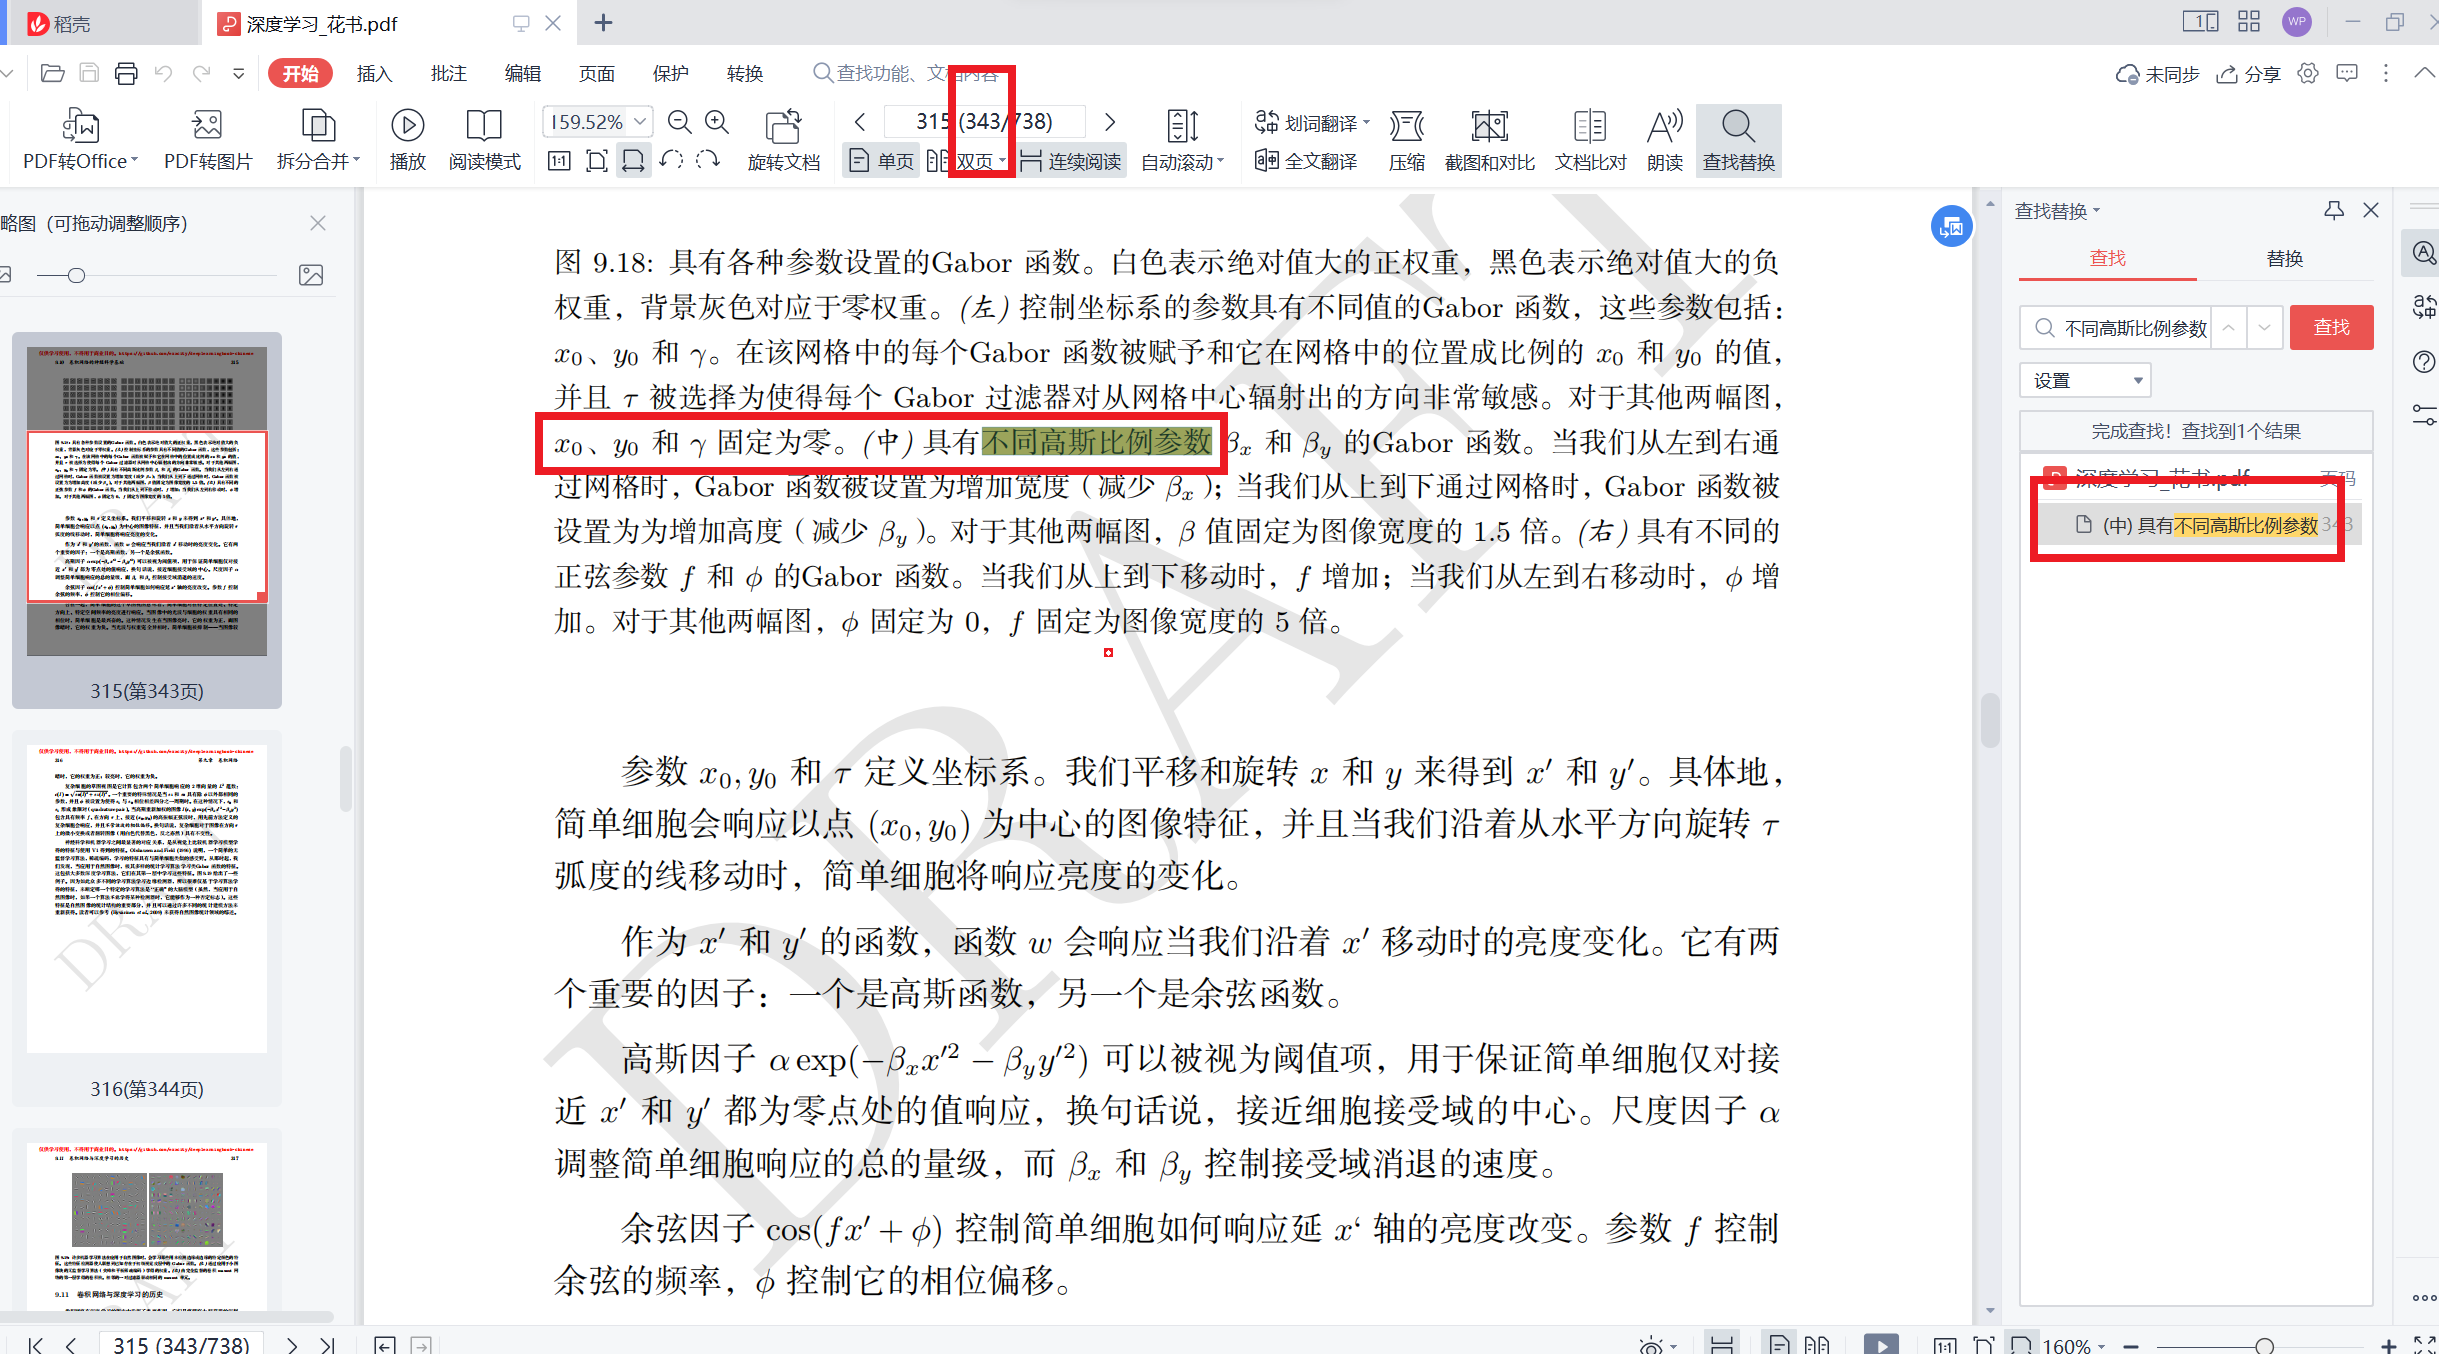
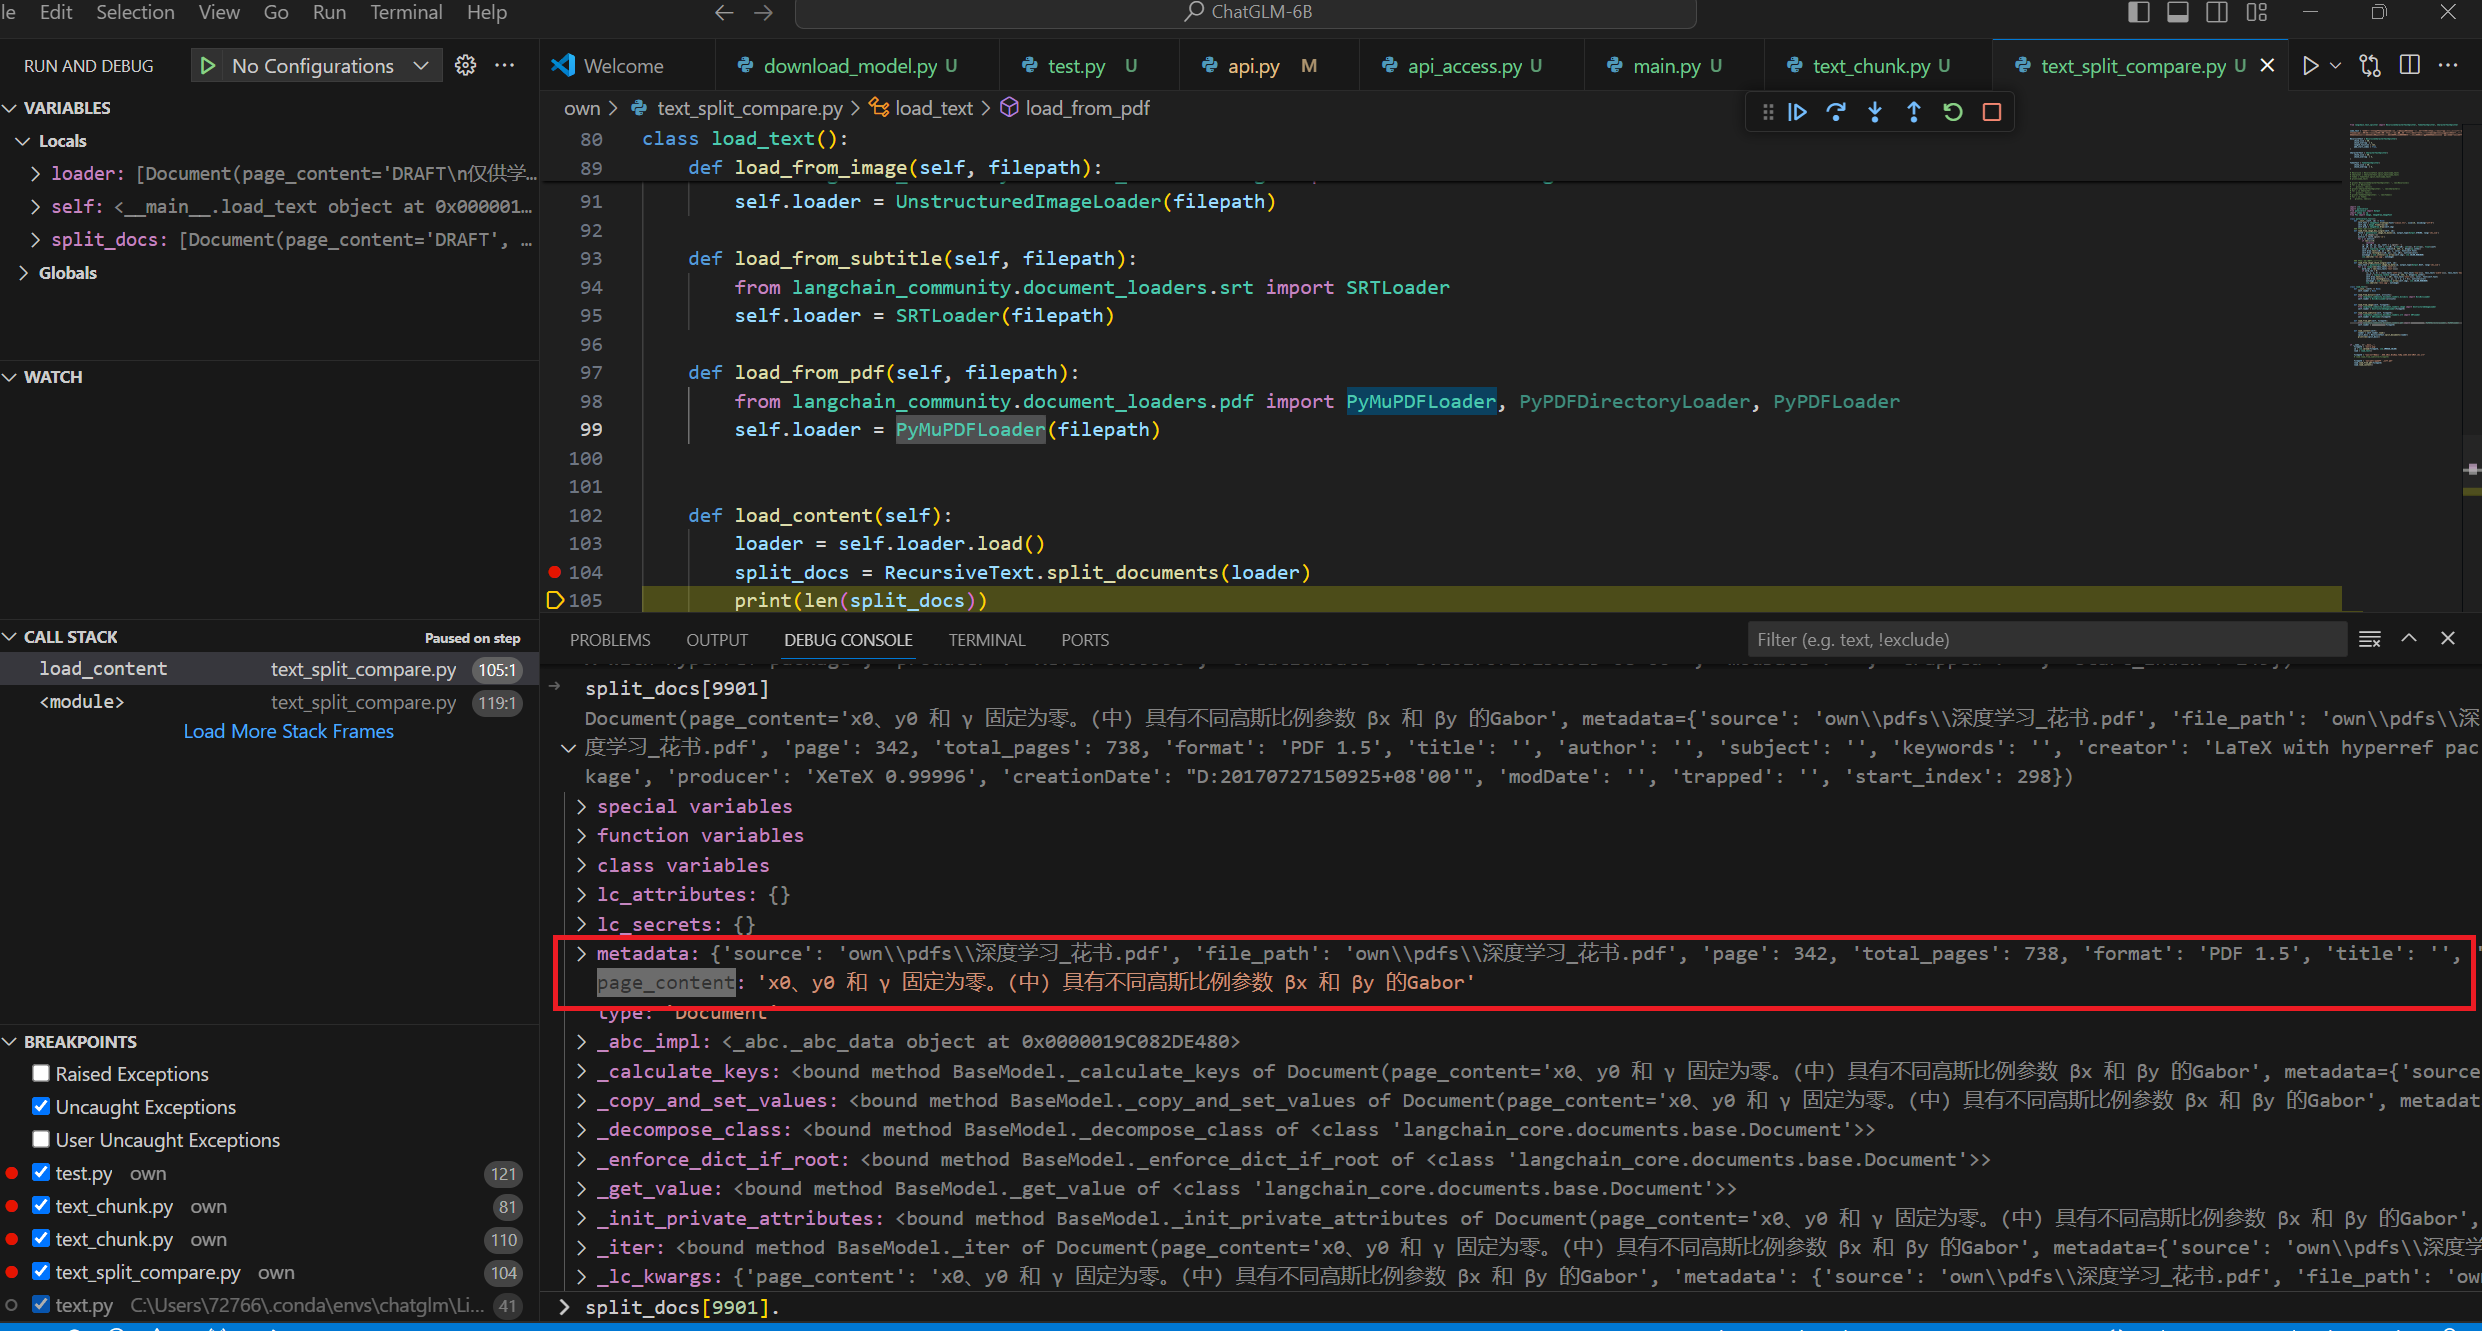
PDF
首先需要安装
使用方法
1 loader = PyMuPDFLoader(filepath)
提取效果
文档切块 1 2 3 4 5 6 7 8 9 from langchain.document_loaders.directory import DirectoryLoaderfrom langchain.text_splitter import CharacterTextSplitterdef load_docs (dirpath ): loader = DirectoryLoader(dirpath) docs = loader.load() text_split = CharacterTextSplitter(chunk_size =256 , chunk_overlap =10 ) split_docs = text_split.split_documents(docs) return split_docs
切块方式 CharacterTextSplitter vs RecursiveCharacterTextSplitter vs Token splitting
看的出来RecursiveCharacterTextSplitter 切分方法效果最好,这个方法也是langchain最推荐的。
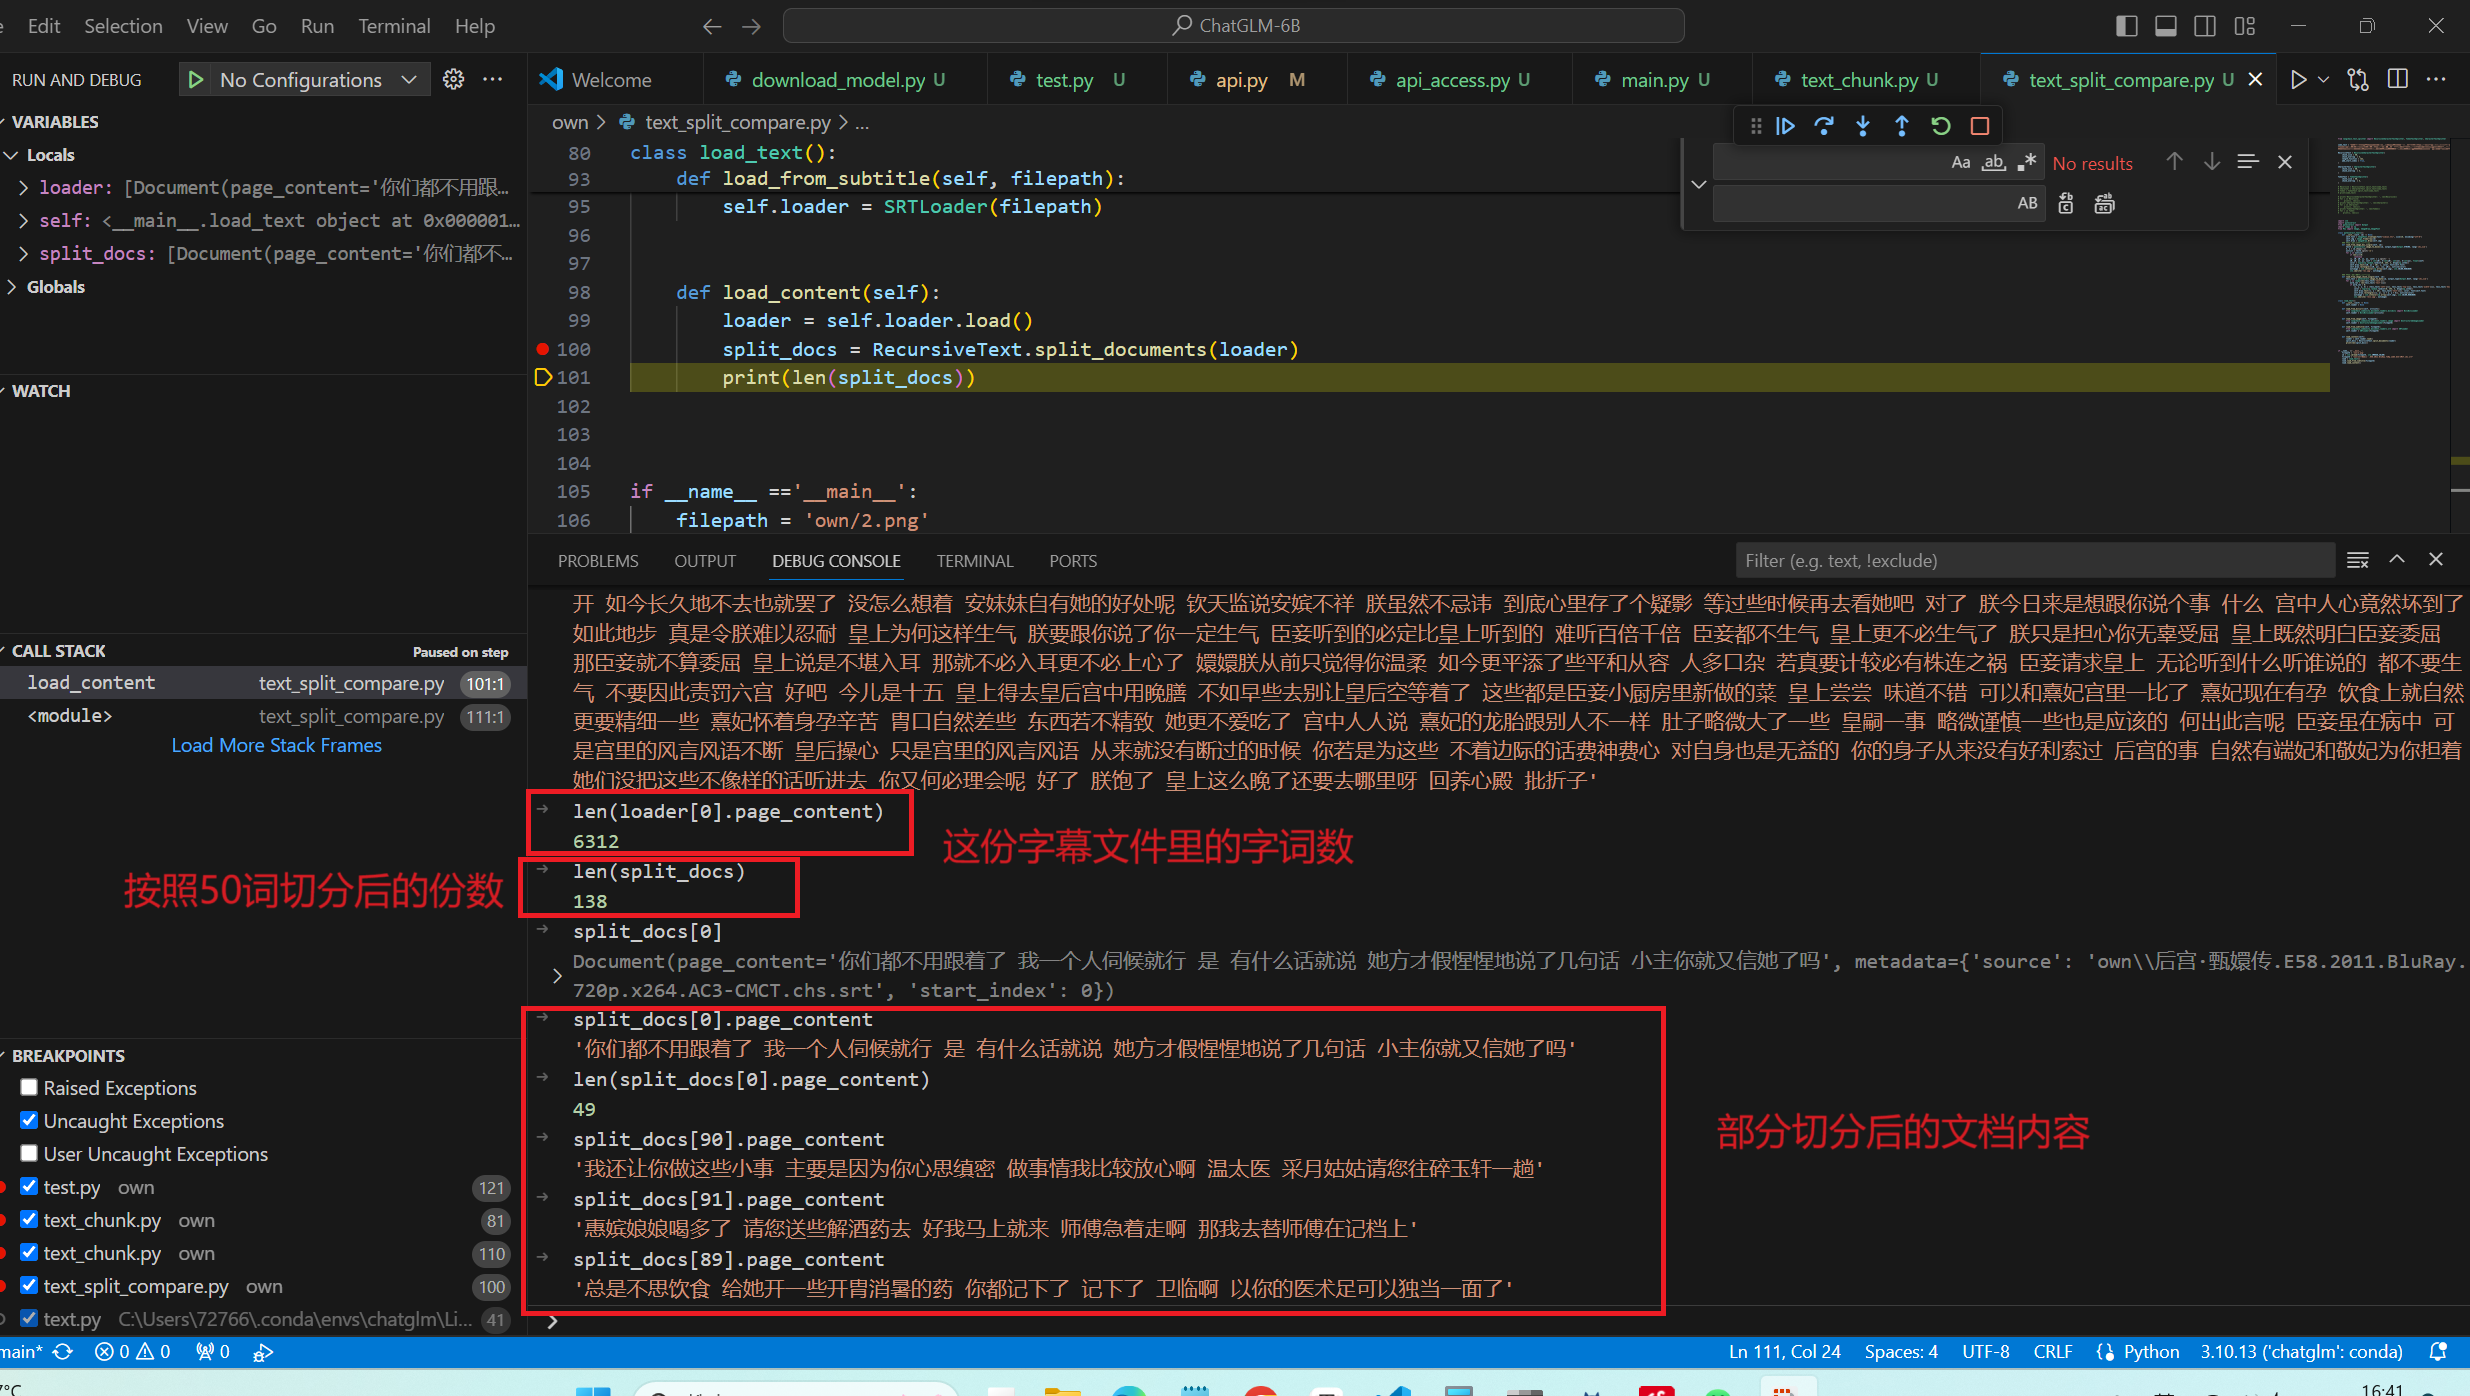
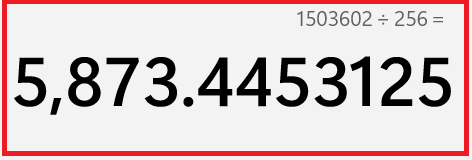
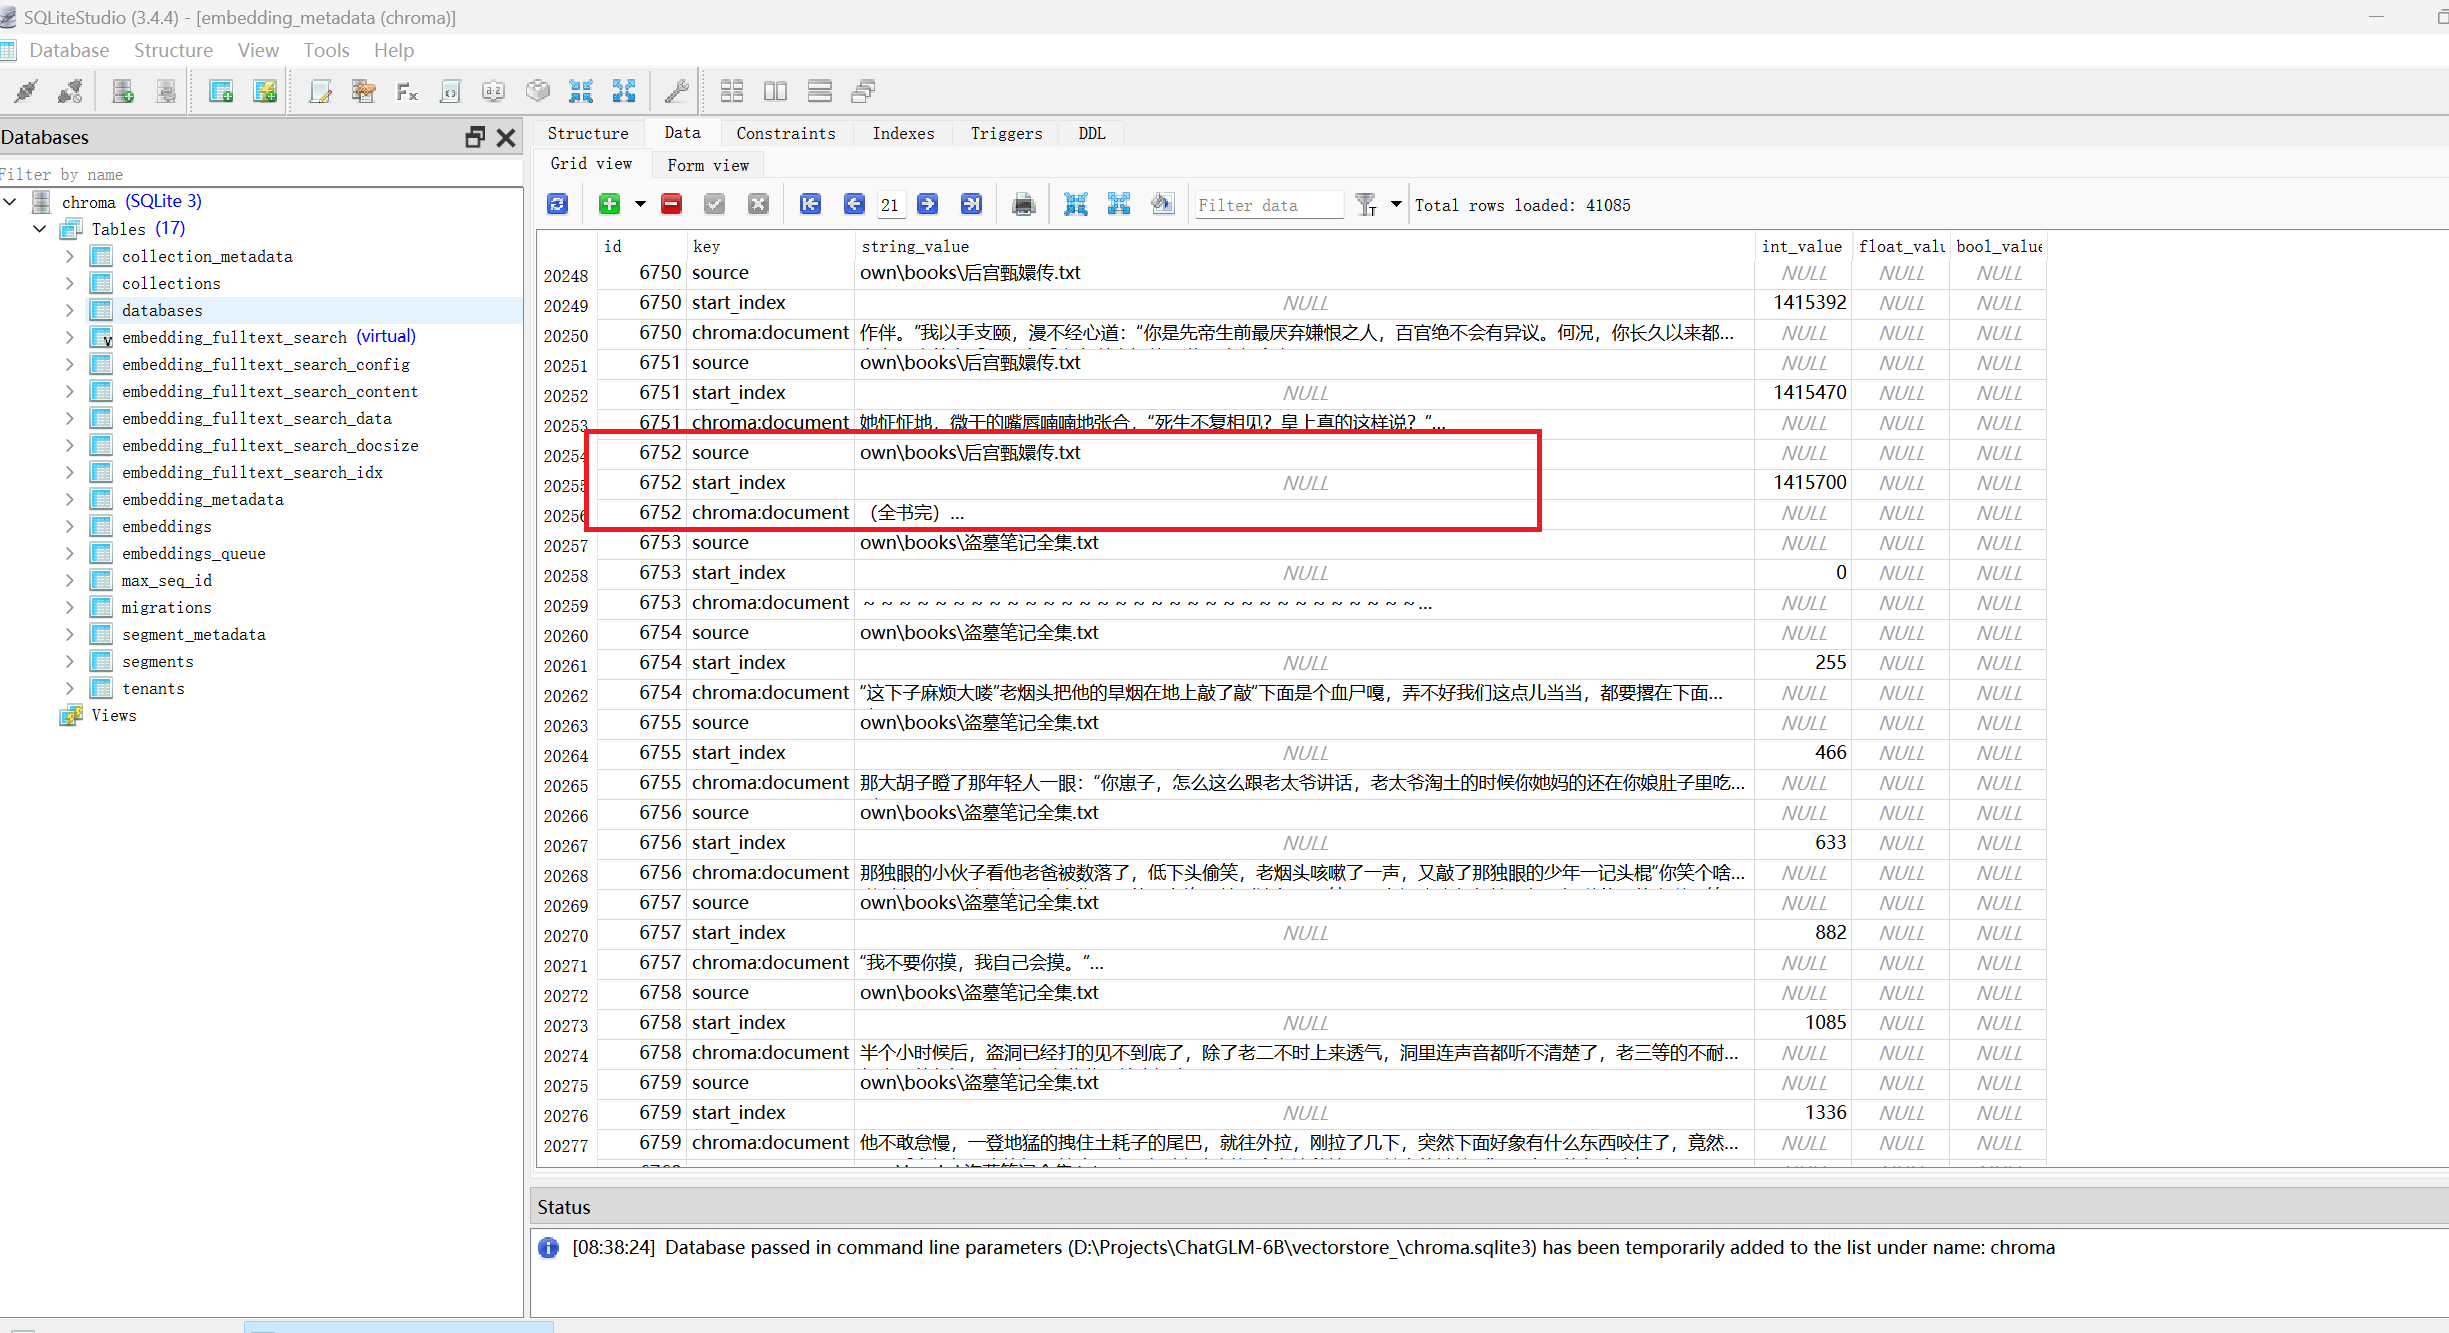
切块数量 甄嬛传当没有重复即chunk_overlap=0的时候应该是被切分为5873段
现在chunk_overlap =10的时候,切分的数目是6572
数目是对的上的
文档向量化 主要包含两步:
第一步加载向量化模型;
第二步向量化并存储;
1 2 3 4 5 6 7 8 9 10 11 12 13 14 15 16 17 18 19 20 21 22 23 24 25 from langchain.embeddings.huggingface import HuggingFaceEmbeddingsembedding_model_dict = { "ernie-tiny" : "nghuyong/ernie-3.0-nano-zh" , "ernie-base" : "nghuyong/ernie-3.0-base-zh" , "text2vec" : "GanymedeNil/text2vec-large-chinese" , "text2vec2" : "uer/sbert-base-chinese-nli" , "text2vec3" : "shibing624/text2vec-base-chinese" , } def load_embeding_mode (model_name ): encode_kwargs = {"normalize_embeddings" :False } model_kwargs = {"device" :"cuda:0" } return HuggingFaceEmbeddings( model_name=embedding_model_dict[model_name], model_kwargs = model_kwargs, encode_kwargs = encode_kwargs ) from langchain.vectorstores.chroma import Chromadef store_chroma (doc, persist_directory, embeddings ): db = Chroma.from_documents(documents=doc, embedding=embeddings, persist_directory=persist_directory) db.persist() return db
参考链接 Credential 类未提供 sessdata 或者为空
获取 Credential 类所需信息
Python OCR工具pytesseract详解